Continuous Integration at PLSE
Continuous Integration has come to mean a lot of things, but in practice it usually means: “automatically build and (optionally) run tests on every commit”. It is a very good idea for you to set up some sort of automated build/test process for your research project. Like investing in a solid build infrastructure, setting up CI is a short-term time investment (and dip in research productivity) that will provide an enormous return on your investment in the long term.
If you host your project in version control (and you should!) then there are several services you can use to build/test your project on every commit. This document outlines the options available to you and how to use them.
Options
There are three options available for you: public Travis CI, our organization’s private Travis CI, and our hosted Strider instance. Read on for how to pick the best option for you.
- Public Travis CI: Travis CI provides free unlimited builds for open-source projects. These builds are hosted on travis-ci.org. You need only log in with your Github credentials and import the Github project and configure the build with the .travis.yml file. If your project is open-source and public, you are strongly urged to use this option as you will use Travis’ (effectively) unlimited resources.
- Private Travis CI: Travis CI also offers CI for private repositories through travis-ci.com (travis-ci.org only works on public repos). The uwplse organization on Github has a private account which gives us one concurrent build for our private repos. This means only one uwplse project can have a build running at any given time. You should use this option if you have a private repository and your builds run in a short amount of time (sub 10 minutes).
- The department’s Gitlab CI service. This option will only work with a Gitlab repo: but supports private repositories and appears well supported and documented by the Gitlab project.
- Finally, if none of the above apply you can use our hosted Strider CI server. This is a good fit especially if you have a complicated setup scheme for your builds (such as building custom software) or your build just takes a very long time and you don’t want to block other users on Travis CI.
The public and private Travis CI options are pretty well documented, so the rest of this document will focus on using Strider.
Strider CI
Strider CI is a Node.js web application backed by MongoDB that spawns Docker containers. Despite the utter nonsense of the previous sentence, read on how to use it.
If some of these instructions do not work contact the CI admin (currently John Toman, jtoman@cs) and he’ll try to help.
Logging in to Strider
Strider uses its own user database. To get an account contact the CI administrator: he will send you an invite code which you can use to create an account.
Note on Github Integration and Email
To link a Github account to a Strider CI account, the email used for Strider logins must match a public email listed on the Github account. Make sure that the email you choose is registered and verified with Github.
Linking a Github Account to Strider
First, register and verify the email you use as your Strider username with Github. Before linking with Github make this email the public email associated with your profile. You can do this on your “Public Profile” page:

Note: If you don’t like having your email public, you can switch back to having no email address after the integration step is completed.
Once done, log in to Strider and you should see a “Github” button under “Link Accounts”:
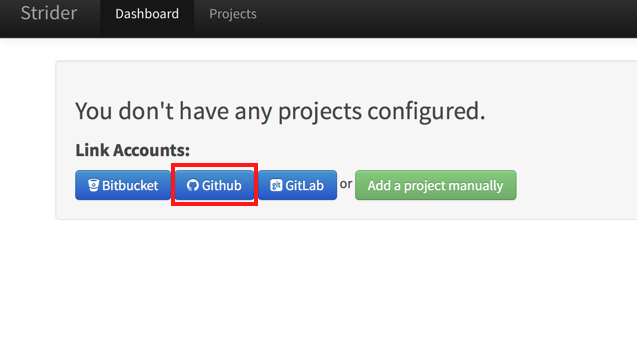
Click this link, and you will be taken to this page:
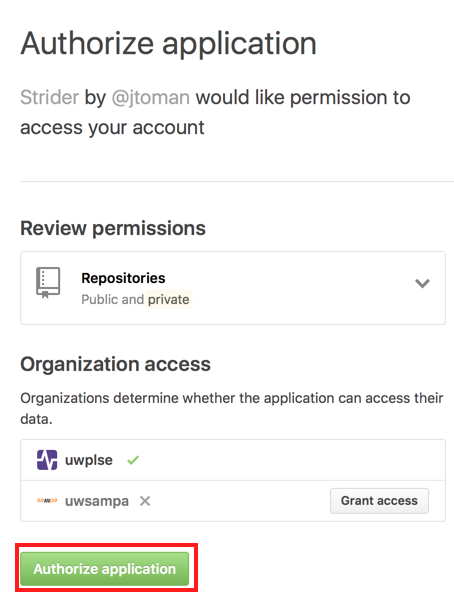
Click “Authorize Application” and that should be it.
Basic Project Setup
This is a quick guide on how to setup a Github project.
-
Go to the Projects page which lists the Github repos to which your account has access. Click the Add button next to a project:

-
Strider supports some project types out of the box but in this case we’ll use custom:
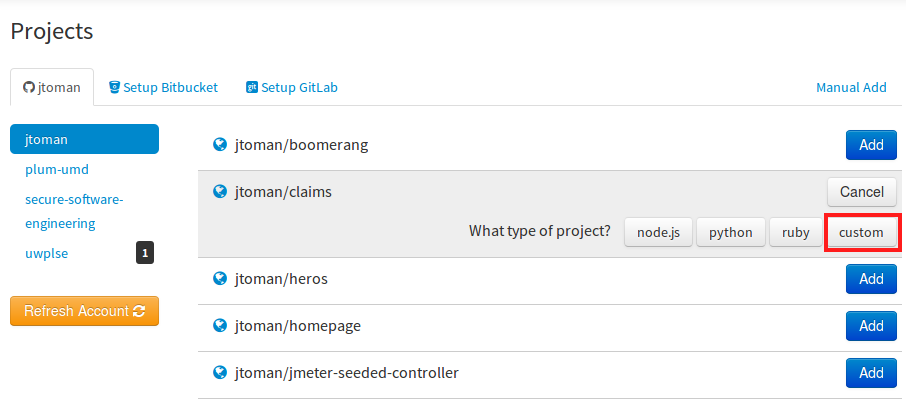
-
At this point we have a working project that doesn’t do anything. To set up the build, navigate to the project’s configuration page. This page can be found by clicking the wrench icon next to the project name on the Projects page.
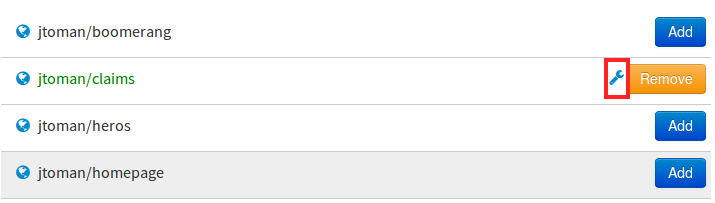
-
First things first: we need to give Strider access to our Github repo. On the Settings page you’ll find Strider’s public/private key pair for the repo. Copy the public key:
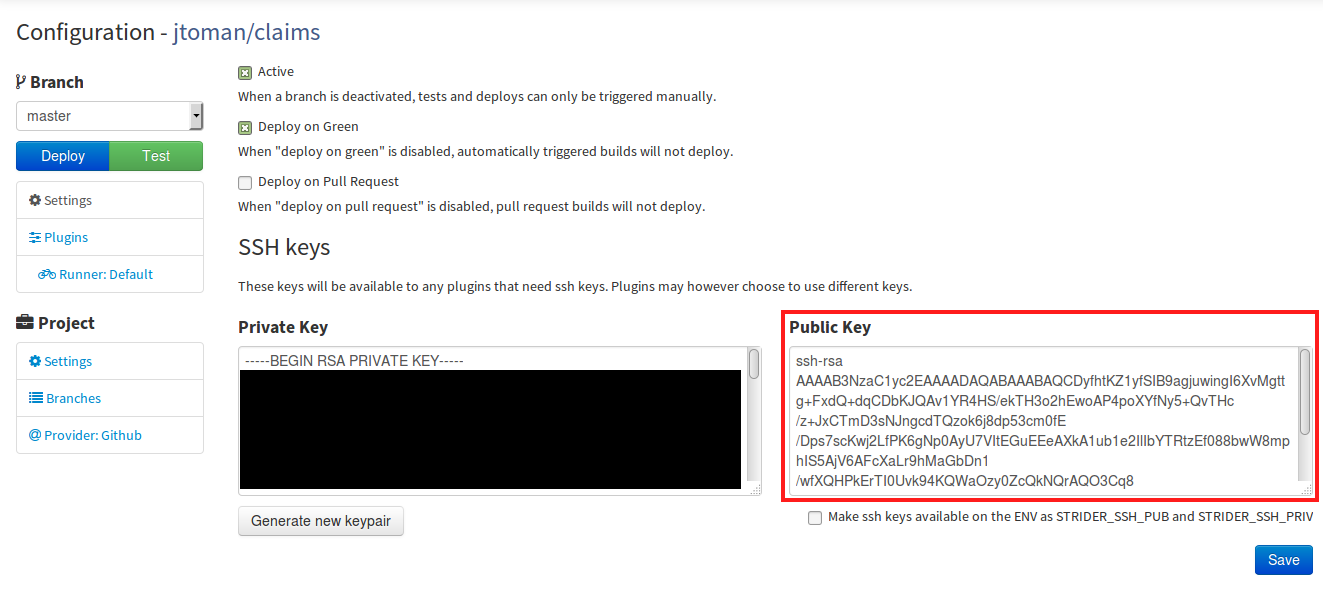
-
Next, let’s head over to the Github repo page (in this case https://github.com/jtoman/claims). Under the Settings tab, select “Deploy keys”, and then click “Add deploy key”
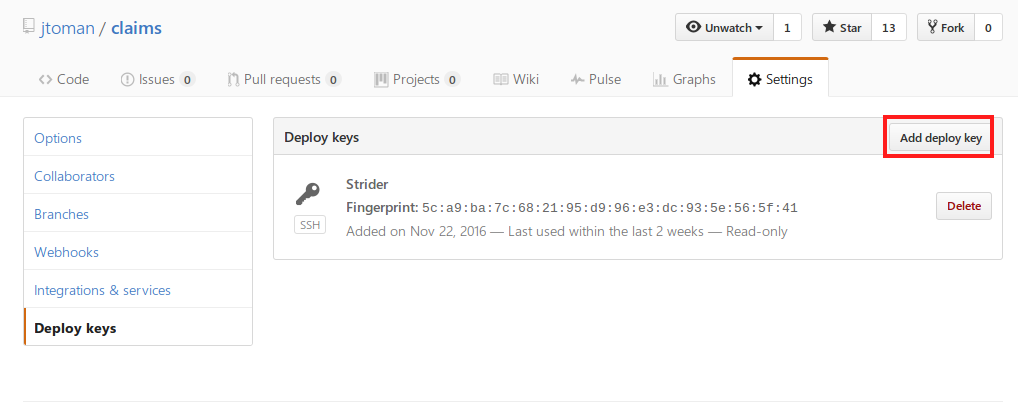
-
Paste in the public key from Step 4 and provide a descriptive name. Click “Add key” when done.
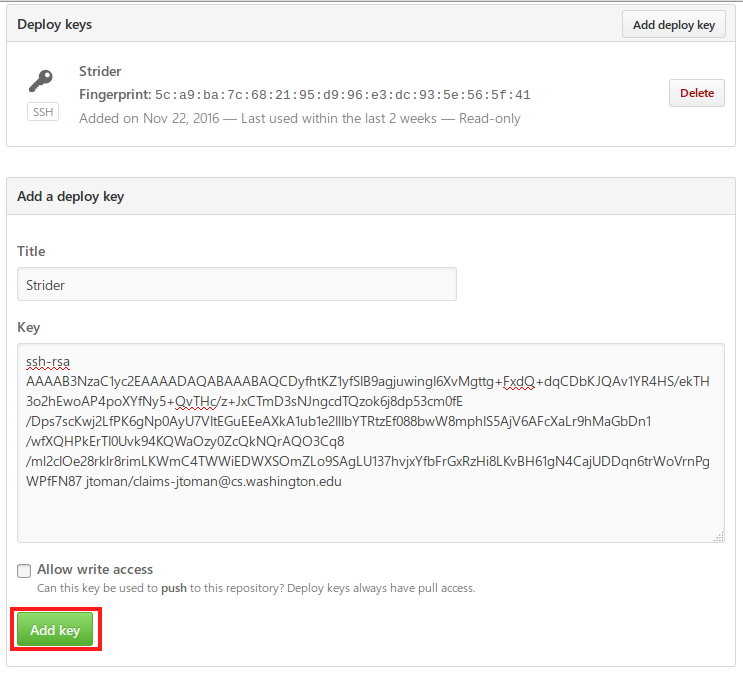
-
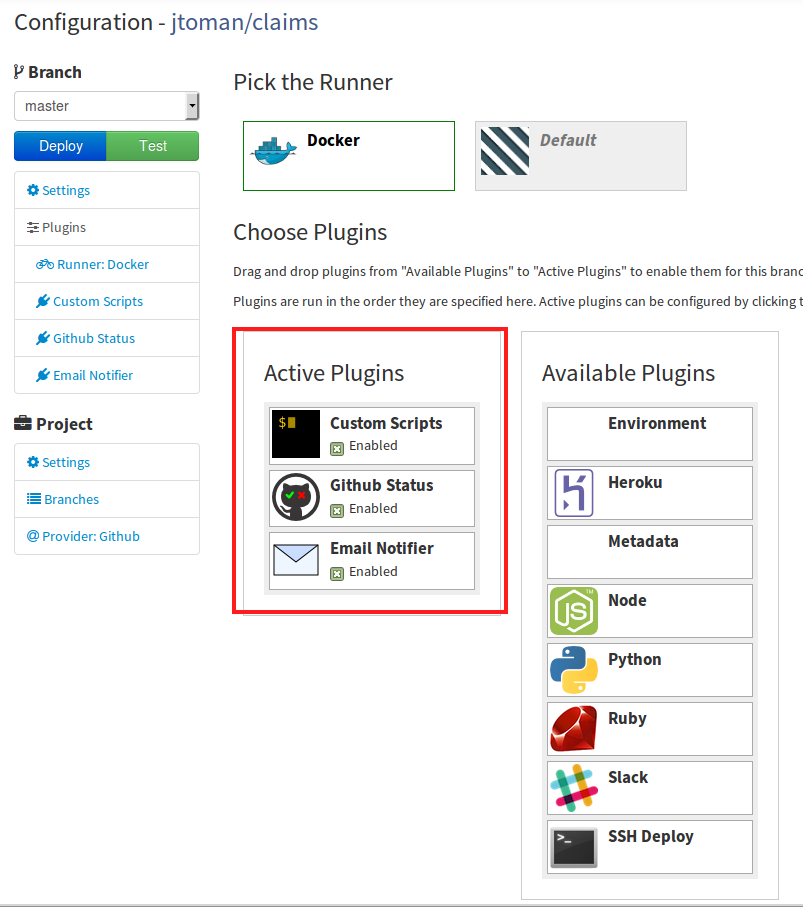
Now we’ll set up the actual build process. First, let’s configure the build to run in a docker container. From the Settings page of the project, click “Plugins”. Then, on the page that appears select the “Docker” runner.
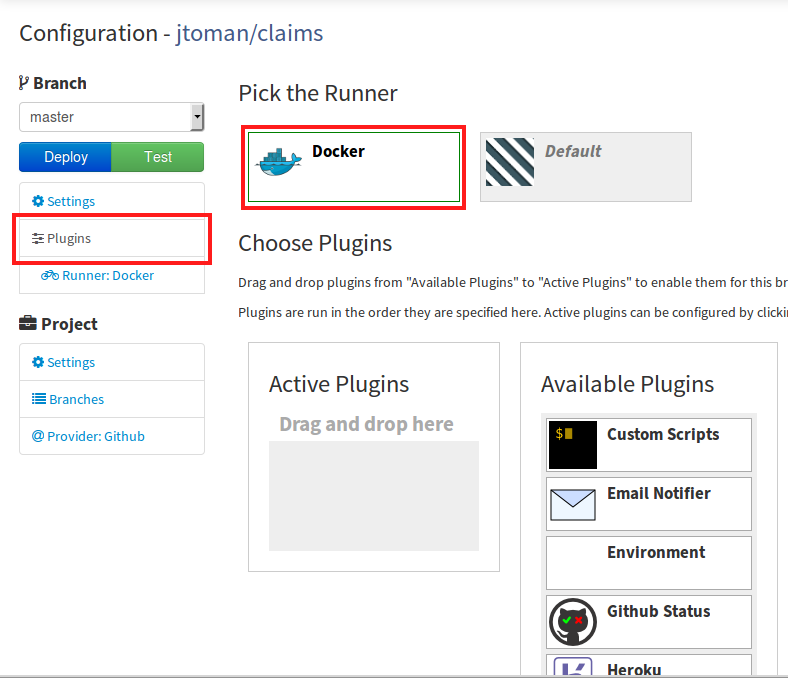
-
Next, we select the plugins for the build. For this project, we’ll use the custom script runner (which lets us run arbitrary bash commands), Github Status, and Email Notifier. Other plugins can be added.
-
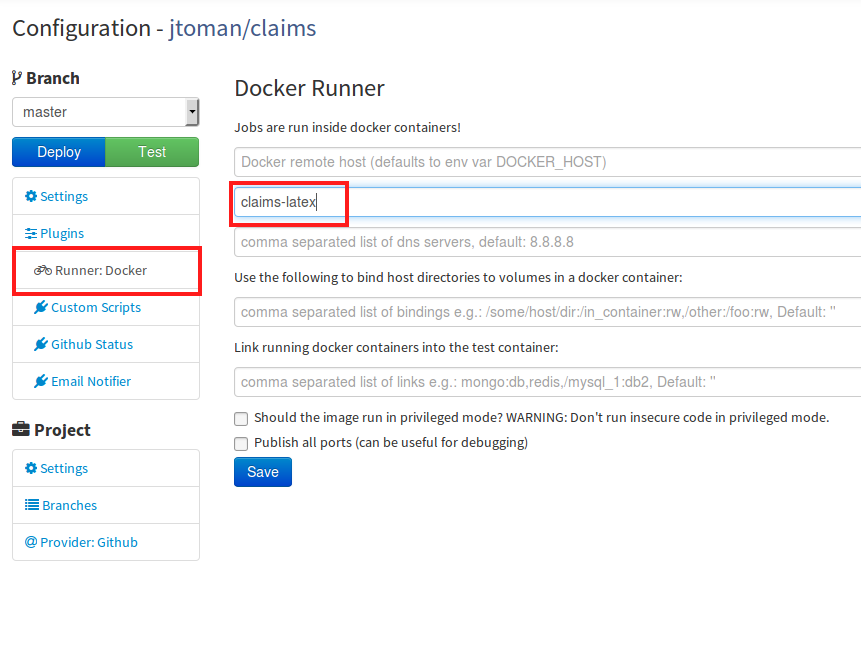
For this project we’ll use a custom docker image (see below on how to set one up). Click on “Runner: Docker” from the plugins page and enter the name of the docker image we’ll use: in this case “claims-latex”. Remember to save when done!
-
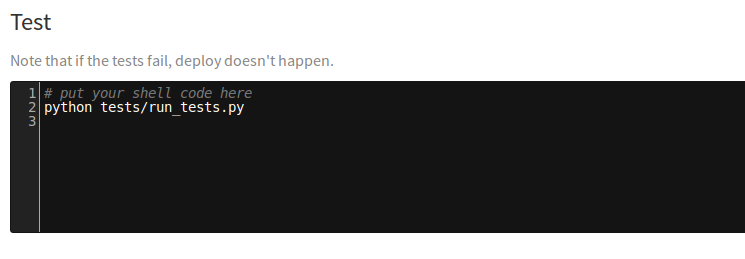
Finally, let’s configure the commands that actually test our project. Under “Custom Scripts” we’ve added
python tests/run_tests.py(these commands are run in the project directory).
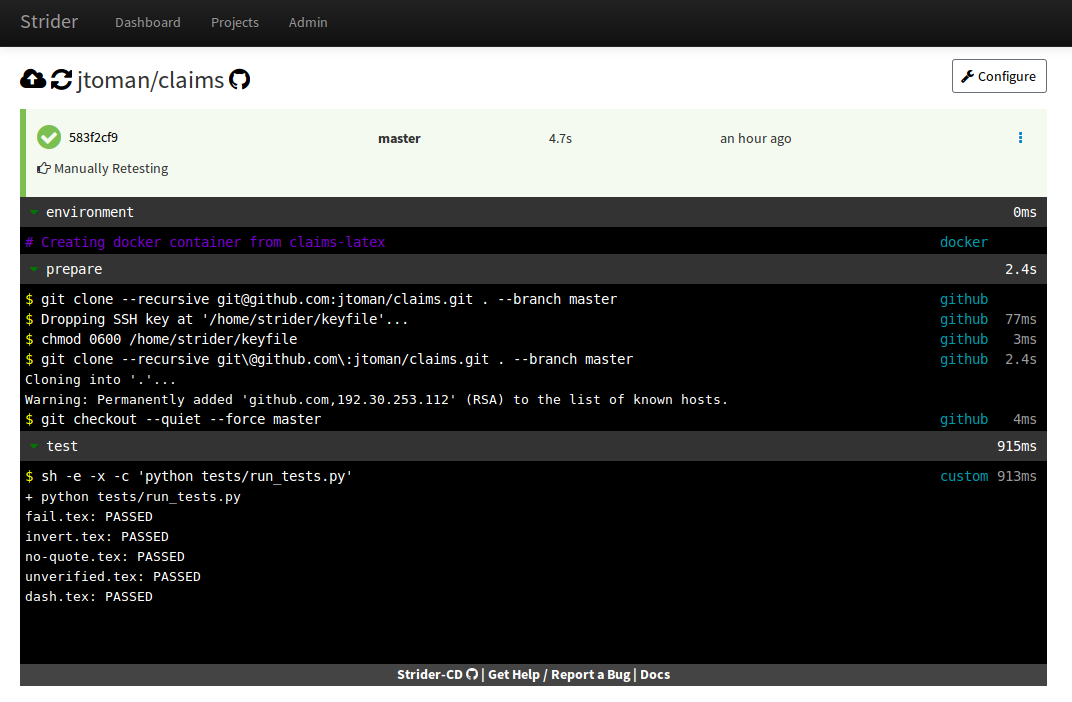
And we now have a simple CI process set up!
More details on configuring Strider projects can be found in this series of tutorials and in the official Strider docs.
Custom Docker images
One of the biggest benefits of Strider is that builds can be run in an arbitrary Docker image. If you have a long and complicated provisioning process, it may make sense to move your provisioning commands into a Dockerfile, and use the resulting image in your builds.
Note: You don’t have to make a custom Docker image, the default image is a fresh Ubuntu 14.04 install with root.
Making a Dockerfile available to Strider
Checkout the CI Images repo. This repository contains all of the Dockerfiles available in Strider. At the top-level of the repository, create a new directory with a name of your choosing (please avoid spaces). The name of the directory will be the name of the docker image. Next, simply create a Dockerfile in the newly created directory. When you push your changes Strider will automatically create an image with your chosen name from the Dockerfile.
See the reference for Dockerfile. Note
that one way or another, your image must derive from
strider/strider-docker-slave and must run supervisord -c
/etc/supervisor/supervisord.conf && su strider -c
'strider-docker-slave as its entrypoint.
Miscellany
- Strider supports build badges
- Strider supports public test results, but be aware that anyone can view the console output produced by your tests!
- As of writing, Strider does not appear to support build matrices
- If you want to store sensitive data in your repo that is used during build, you can encrypt this information using the same public/private key pair used to clone from Github. You can make these available to the build process by checking the “Make ssh keys available on the ENV as STRIDER_SSH_PUB and STRIDER_SSH_PRIV” checkbox on the project page.